Sunday, August 21, 2016

A Monument to Risky Play


Last week my family visited The City Museum
in St. Louis, Missouri. The City Museum isn’t so much a museum in the traditional sense (although they have a great display of architectural artifacts). In the words of its website, the City Museum is “an eclectic mixture of children’s playground, funhouse, surrealistic pavilion, and architectural marvel made out of unique, found objects.” From a child’s perspective, it’s a huge, challenging playground made out of really cool stuff.

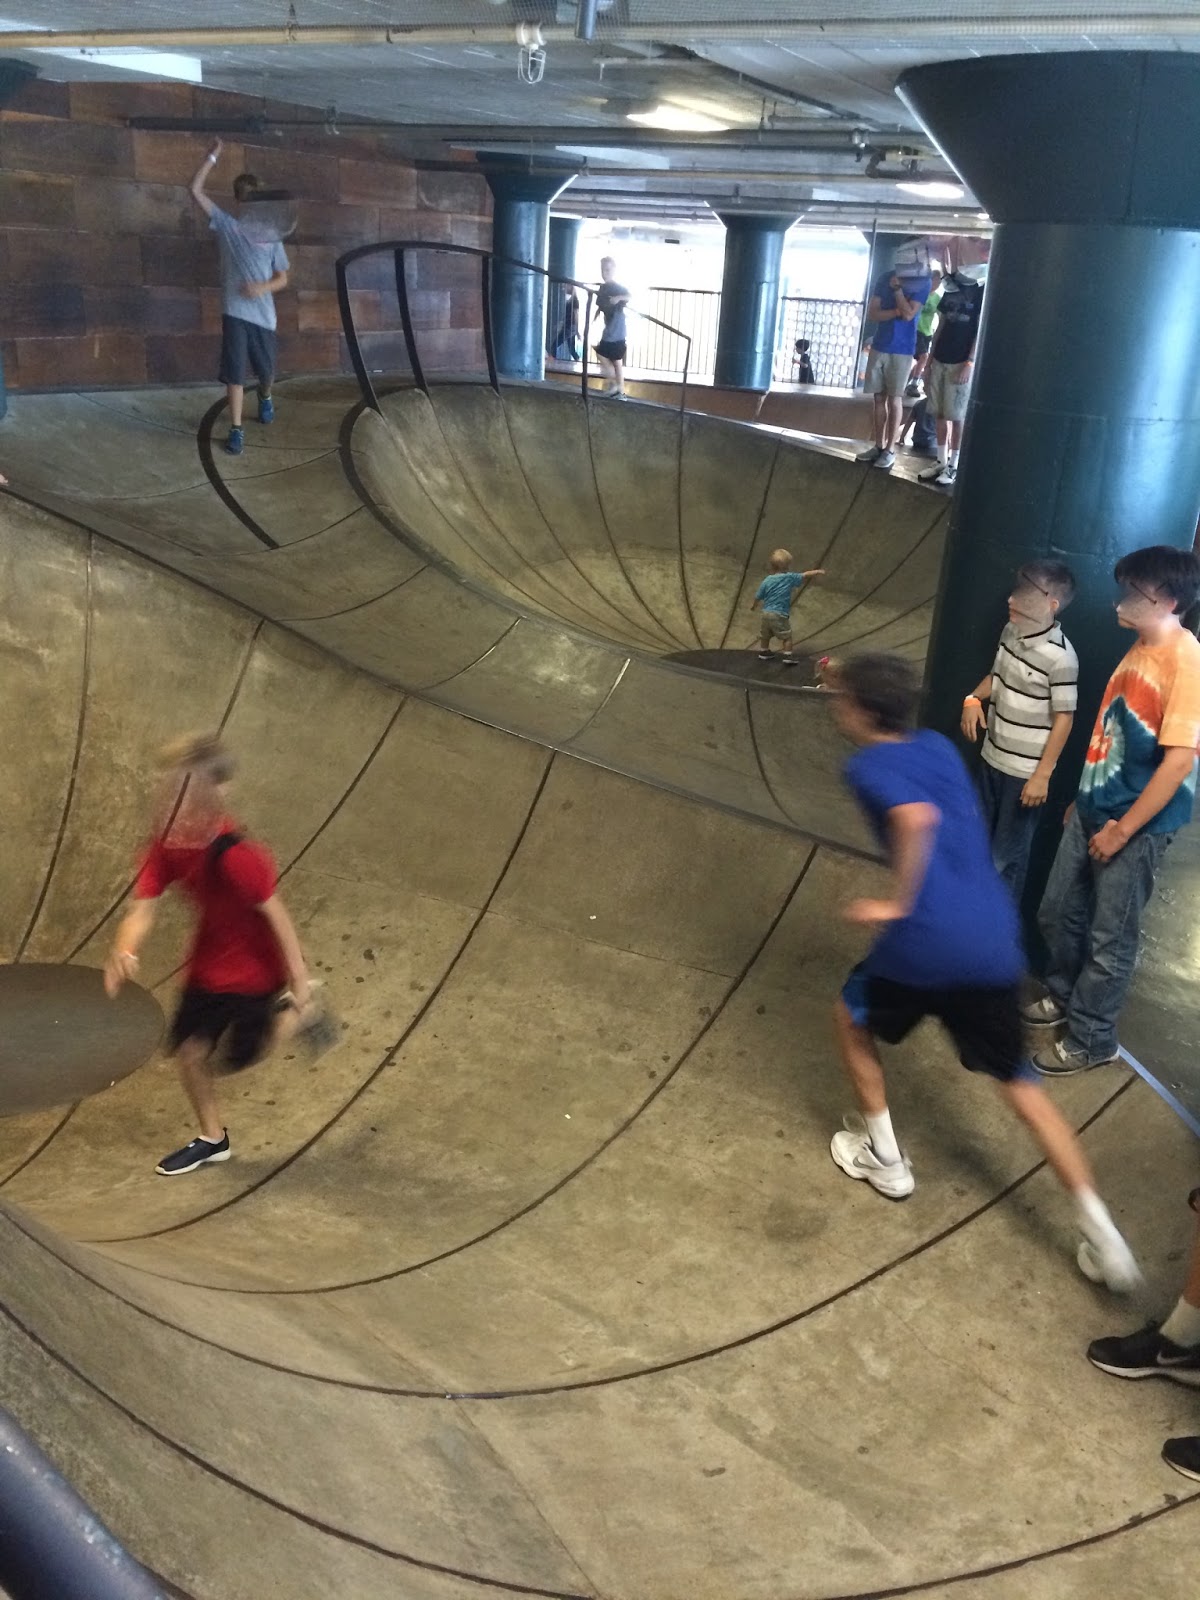
The cool stuff is salvaged and “found” materials, welded together to make extraordinary climbing apparatus. Indoors, there are multiple levels of artificial caves including child size tunnels to disappear into out of adult reach. Outdoors there are spiral cage like tunnels and slides connecting junked airplanes, cranes, and buses, all dozens of feet in the air. On the roof, ten stories up, are even more of these spiral tunnels and huge slides, suspending you literally a hundred feet over the city.


On first look, this seems like the very definition of risky play, as children explore, discover, and push themselves to figure out ways to complete physical challenges of their own making. But as I watched children wind through the tunnels, it occurred to me that much of the risk is perceived risk not actual risk. Much like an amusement park, it’s thrilling to be a hundred feet off the ground. But completely surrounded by a steel cage, there isn’t any actual risk or danger. The environment is created to challenge children physically and imaginatively, while protecting them from getting hurt.


Not that no one will get hurt. I saw children spill over and bump heads and elbows coming down the slide, or scratch a knee on the edge of a ladder, or get hit in the face by a rubber ball in the ball pit. But part of the nature of risky play is learning to distinguish between levels of risk. Physical challenges involve the risk of a scrape or a bruise, but to raise resilient, competent children, we need to teach them the difference between a puncture wound and a bruise. We need to teach children that exploring challenges and new situations is worth the risk of a minor hurt, whether physical or emotional. And we need to teach children how to respond appropriately to that hurt. A bumped knee, a scratched elbow are something we can recover from, and the play is often worth the risk.


Saturday, August 6, 2016

To Smock or Not To Smock

This week I presented a workshop called “Planning Purposeful Play”, all about how to set up classroom environments and present materials in ways that encourage children's engagement in intentional, purposeful activities. My presentation included a slide show of different materials and play scenes from my classroom, and in both sessions, participants mentioned that they noticed that most of the children in the photos weren’t wearing smocks.


I hadn’t really thought about this until they pointed it out. I’ve worked at programs that require smocks and ones that don’t. I’ve worked with teachers who require smocks for any art or sensory activity, and ones who only require smocks for things that can wet or stain clothing. I’ve visited schools where there are no smocks at all, so whether or not to wear them isn’t even an option. In my own classroom, I’ve tended to lean toward encouraging smocks but not requiring them. So, what do I say to workshop participants who want to know my view on smocks?

It depends.

It depends on your own personal comfort level as a teacher. It depends on the policy of your school, and your relationship with parents. It depends on the culture of the classroom and of the communities you serve. It depends on the children – not everyone wants to wear a smock, and not everyone is willing to get messy.


But, since “it depends” doesn’t sound like a satisfying answer, I’m trying to flesh out what that actually means in practice. Whether or not to require/encourage/provide smocks is as important a planning decision as how to choose materials or how to set up an area of the room. Here are some things I consider when making the smock decision:

1) What are the expectations of the parents? In most schools where I’ve taught, parents are told that their children will get messy and stained, and to send them in clothes that can get dirty. However, not all parents are comfortable with this. Schedule and transportation routines after school, access to laundry facilities, and personal preference all play a role in parents’ attitudes. I wouldn’t say that all children must wear smocks just in case some parents don’t want mess, but if a parent requests I put a smock on their child, I will try to.

2) What is the child’s comfort level of wearing/not wearing a smock? One of my basic beliefs in planning is to set up an environment where children can be successful doing the play based learning that I want them to do. A child who doesn’t want to get wet or messy might feel more comfortable wearing a smock. A child who doesn’t want to wear a smock might avoid wet or messy activities to avoid wearing a smock. In the end, my goal is for the child to be able to play where they want to – if a smock is helping them or keeping them from playing, I’m going to make the decision that best helps the child engage in play.


3) How messy is the activity? Looking at my photos, I saw the children were wearing smocks while playing with shaving cream and tempera painting, but weren’t while playing with water, sand, or watercolor paints. If a material is likely to get all over clothing, I’m more likely to encourage smocks. And if a material is more likely to stain, I’m more likely to encourage smocks. Wet clothes will dry, painted clothes will need to be washed. But still, if having to wear a smock means a child will refuse to paint, I’d rather see the child painting.

4) Can they wear the smocks comfortably and do the activity? Do smocks impact classroom management issues? I realized I’m less likely to require twos to wear smocks than older preschoolers. It’s very hard to find smocks small enough to fit toddlers and twos, and many of those small smocks are designed in ways the younger children find uncomfortable or hard to put on – they have sleeves or snap closures, or other features they can’t do by themselves. Which creates a classroom management issue. If they can’t put them on or take them off by themselves, a teacher needs to help. Or, if they do take them off themselves, whatever paint is on the smock is likely to get all over their clothes anyway.


That last statement is probably the biggest reason I don’t worry much about smocks, because no matter what I do, the paint or water will get on their clothes anyway. We’ve all seen kids reach under their smocks to wipe their hands on their clothes, or pour a bucket of water on their pants and shoes. We can do the best we can, and we can tell the parents we’re doing the best we can, but in the end, play can be messy. Smocks or no smocks.


Sunday, July 24, 2016

Beginnings and Welcomings

The beginning of the school year is coming, and I stopped by the local teacher store looking for something new. I don’t know what, just something new I could add to my classroom that would engage the children. And that would give them something to do. My general focus in the classroom is to provide materials that encourage the children to think “What can I do with this?”and engage in innovative, expansive and creative problem solving. As I perused the shelves looking for maybe one more manipulative, or one more loose part to add to the art area, I noticed how slim the selection was.

What there was, however, were classroom decorations. Rows and shelves of borders, name tags, welcome signs, holiday symbols, job charts, and more, taking over the entire front of the store. And these seemed to be what other customers were drawn too, as I watched other teachers, excitedly gather rainbow colored owls and scalloped borders dotted with zigs and zags.


This scene played out at other stores I visited this weekend, from teacher stores to Walmart to the dollar store. I overheard conversations between teaching teams out shopping together – what would be the best and most exciting way to decorate a bulletin board to welcome kids to the classroom for the new year?


Here’s my idea for the best welcome. Have meaningful and exciting things for the children to do.

As I looked at the rows of borders and badges, what struck me was how much time, effort, and money is spent on something so inconsequential to children’s learning. The most beautifully designed “Welcome back to school!” board, with the most inventive puns (“Kick off the year!” “We Bee-Long in the Purple Room”) illustrated by matching cut-outs, aren’t going to help children learn. The scalloped borders aren’t going to build community, or encourage a child to explore a material for the first time, or lead a child to a new discovery. The money spent on all of these factory made decorations, created and chosen for adult aesthetics could be so much better spent on buying materials the children could use.

I’d challenge teachers to think about how to create an authentic welcoming environment in the classroom. When the children walk in, is there something immediate that they can choose to do and become engaged in? Is there space that they can control and make choices over? I’d challenge teachers to pass up the scalloped borders and use that money to buy one more puzzle, or a set of magnets, or an art material they’ve never used before. I’d challenge teachers to pass up the factory made die-cuts of owls or birds or baseballs that they write children’s names on and staple to the bulletin board, and instead fill that board with photos of the children and the scribbled art they create on their first days. I’d challenge teachers to take a good hard look at the classroom through the children’s eyes, and ask – what would make me feel welcome? What would make me want to come in and play? It probably isn’t a rainbow border or die-cut owls. 


Sunday, June 26, 2016

Playing Their Way – Geometric Shape Sorters

All of us – children, teachers, parents – have some toys we like more than others. I’m personally not a huge fan of math manipulatives that involve sorting for the sake of sorting, or fitting pieces together for the sake of fitting them together. I’m a lot more interested in manipulatives that can be used for creative building, or that can be used in a variety of ways – not the “self correcting” way where if a child doesn’t do what the toy designer planned, they can’t complete the task.

But, materials speak to everyone a variety of ways, so even if a toy isn’t one of my personal favorites, I still have it in my classroom, because one of the children might find it interesting even if I don’t. There’s also the tricky balance of selecting materials that meet the needs of all the children – ones that are challenging enough for older children but not frustrating for younger ones. One of things that’s appealing about open ended and “found” materials is that children can use them in a variety of ways, at whatever developmental level a child is at.

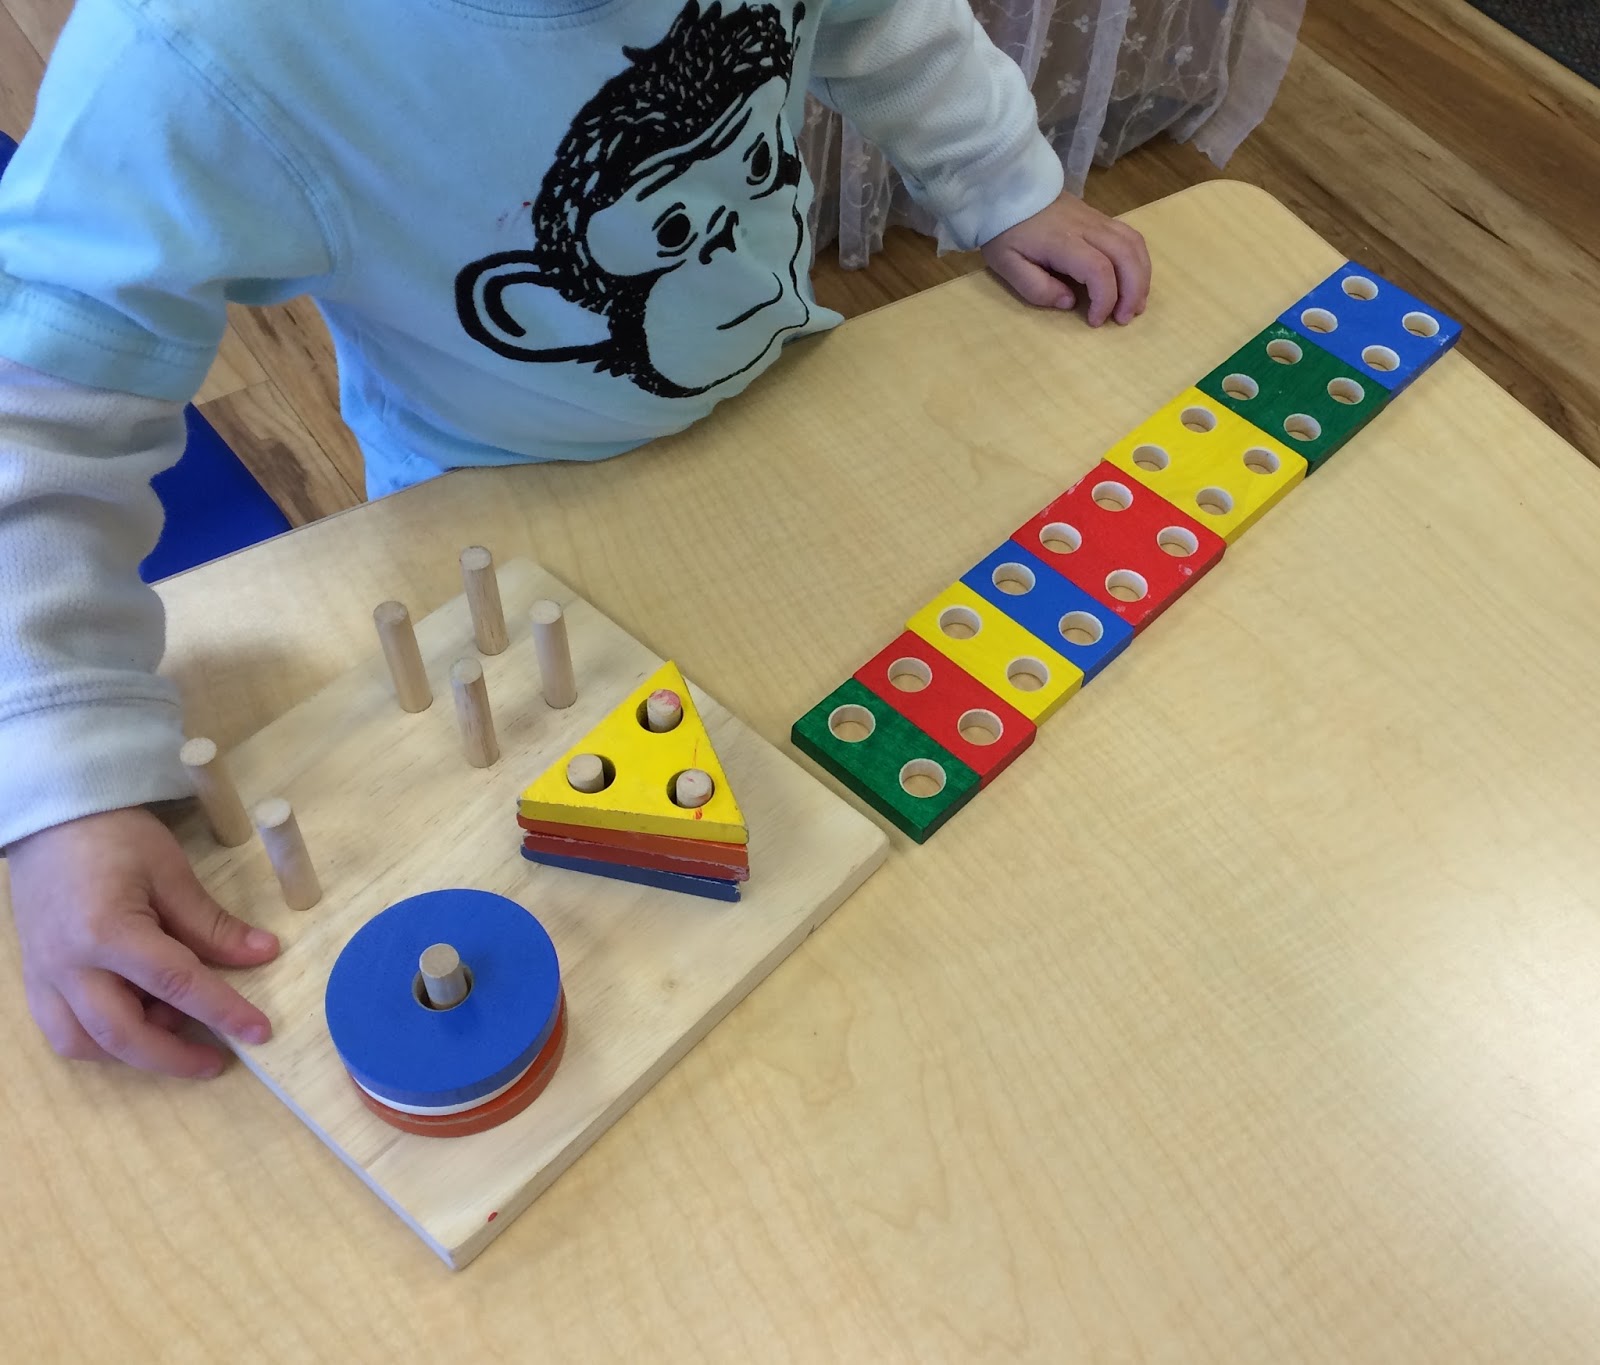
But, even if a toy seems to be close ended, giving children the freedom to explore and find novel ways to use that toy encourages innovation and problem solving. I saw this as my two-and-three year olds explored “Geometric Sorting Boards”. These are puzzle like contraptions that have multi-colored geometric tiles that fit onto pegs. Each geometric shape has a different number of holes, with the presumed goal that the children will line up the correct tile over the correct pegs. According to the manufacturer, this toy teaches “math concepts” “shape recognition” “color and pattern recognition” and “early geometry”. What I notice more often is that this toy is frustrating, because it’s hard to line the holes up over the pegs. And most preschool age children aren’t developmentally able to consider multiple characteristics of an object simultaneously – color, shape, number of holes, number of holes, and most of all, considering number of holes and number of tiles at the same time.


So, what did young preschoolers do with the geometric shape boards?


They took the shapes off the pegs. They stacked the shapes and lined them up. They carried the shapes to other parts of the room and pretended that the circles were cookies.
A few children tried to fit the shapes back on the pegs, but quickly lost interest. The pegs weren’t as interesting as the shapes themselves.


As I wrote in my last post, children will play their way with whatever we give them. We don’t need to “teach” children colors, geometry, and number – those concepts are embedded in the objects all around them. And trying to “teach” a concept they aren’t interested in isn’t going to work. Real learning takes place through self-initiation, exploration, and innovation.

Wednesday, June 22, 2016

Playing Their Way – Dollhouse Furniture

Sometimes no matter what a toy manufacturer has in mind, children find their own ways to use the toys. The way children use toys is tied to where the child is developmentally, and what schemas they’re using to explore their environment.

In my two and three year old classroom, we brought in a basket of dollhouse furniture and small wooden dolls and put them near the blocks. The children sometimes used toy animals as part of their block play, so we wondered whether they would use the dolls or furniture as well.

Two and three-year-olds generally don’t engage in pretend play where that involves acting out roles using representational objects. At this age, pretend play typically involves object substitution (pretending one object is another). And, interest in the objects themselves and exploration of their physical properties is often more engaging than pretending.

Sure enough, one of the first aspects of the furniture that the children noticed was that there were moving parts: doors and drawers that open and close.


And of course, if it’s empty inside, you have to fill it.


Some of the children used the furniture as building materials, and figured out which ones stacked and which pieces could fit inside other pieces.


One of the children did use the dolls with the furniture, but that also involved just seeing what pieces fit inside each other. And after putting a doll in or on a piece of furniture, she moved on to something else.


The one piece of furniture that evoked pretend play was the toilet, which makes sense, because using the toilet is a theme the children are very personally involved with. But they didn’t use the dolls – it was the small plastic sheep and bears that needed to “go potty”.


And of course, one of the best ways to explore a material – any material – is to line up the pieces on a shelf at eye level.


My starting point for curriculum planning is to plan based on what children might do with the toys, not on what the toys are. Children will play their way with whatever we give them. It’s our job to recognize the value of that play and build on it.

Friday, June 10, 2016

Teaching Take Apart


Recently on a teacher discussion board I follow, some teachers were discussing the new trend of “take apart” or “tinkering” centers and how overwhelmed they felt trying to manage those activities in their classrooms. “Take apart” isn’t actually a new trend, but the current push toward emphasizing STEM (or STEAM or STREAM) activities has pushed the old tools and woodworking activities into the spotlight. The teachers on this board felt pushed to provide science and technology activities, but were struggling with how to do it in a child-directed play based way that ensured children’s safety. They were concerned about physical safety – children using tools like screwdrivers, wrenches, and wirecutters safely. But also about emotional safety – one of the common concerns mentioned was how easily the children got frustrated trying to take out screws or untangle wires. Several teachers said the activity ended with children hitting and banging the materials against the table, or smacking them with the screwdriver.

One of the things we sometimes forget in play-based curriculum, is that teachers are there to teach. We can follow children’s lead, and build curriculum around their ideas, but in our role as experienced adults, we can also provide the scaffolding and guidance they need to develop skills and to learn the steps needed to accomplish tasks independently. “Take apart” (or using tools) doesn’t involve a natural process like gravity or flotation that can be discovered through observation or trial and error. It involves a complex set of visual motor skills and use of human designed tools. Some children can figure some of these skills out independently, but some need scaffolding – adult guidance to help them complete the task successfully with as much independence as possible.

Before embarking on a take-apart project in my four-year-old room, I wanted to give the children an opportunity to explore and practice with the tools they would be using. I bought several different sizes of Phillips and flat-head screwdrivers, and a variety of large screws with wide heads. I put these out on a table with large pieces of Styrofoam, and inserted several of the screws into the Styrofoam. I showed the children the screwdrivers, and asked them if they could figure out how to screw and unscrew the screws.


Some of them had worked with screwdrivers before. Some hadn’t. One of the children noticed the difference between the flat head and Phillips head screws. I suggested they try both types of screwdrivers, and see if the same screwdriver worked on both screws. They figured out right away that they didn’t, but I wonder if they would have noticed this important difference if I hadn’t encouraged them to experiment.


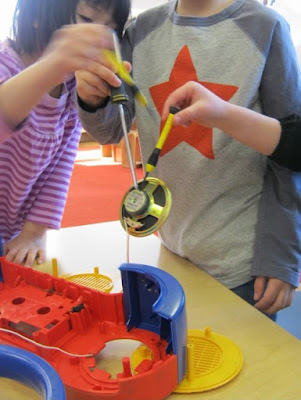
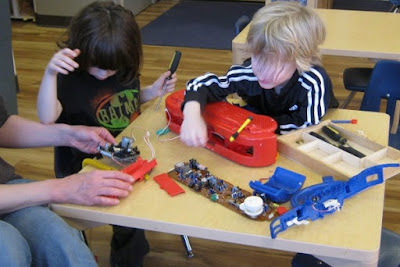
 After a few days of working with screws and Styrofoam, with a teacher participating alongside them, it was time to move on to “take apart.” My co-teacher brought in an old cassette player, and we loosened the outside screws ahead of time, so the children would be able to unscrew them on their own. My co-teacher worked alongside them, to help hold the cassette player, or help turn a screw that they were having trouble with, and to simply manage the area, helping them to negotiate turns and to pass the materials around the table.


When they finally opened the case, figuring out what was inside wasn’t nearly as interesting to them as taking it all out.


The most interesting discovery about the contents was that the speaker was magnetic, and each child tested this by sticking their screwdriver to it. What a speaker is, and why it’s magnetic, wasn’t even a question – they were focused on the process of sticking metal pieces to the magnet


After everything was taken out, I asked if they thought they could put it back together. At that point, several of the take apart crew had left, because when you’re four, taking things apart is usually more interesting than putting it back together. But two of the children stayed with the project, and with my help, figured out how to close the cassette player case and fit the screws back in.


Did they figure this all out independently through play? No. Did they follow step by step directions and learn how cassette players work? No. But someplace in between completely child driven and completely adult led activity, they explored, they observed, they predicted, and they problem solved. Which is what science is all about – with our help.

Wednesday, May 25, 2016

Just One Small Planning Decision

I write a lot about intentional teaching, and the importance of setting up activities in a planned and thoughtful way, but there are always those “why didn’t I think of that before” moments.
One of the manipulatives I have in my classroom are “hex boards”. I don’t know what this toy is actually called, but it’s a set of boards that have rows of raised circles along with multi-colored hexagon shaped tiles that fit on top. I assume they were designed for patterning activities. Sometimes the older preschoolers use the boards this way, lining up rows of different colors, or choosing to alternate tiles in a pattern. The younger children usually just fill up the boards in a random way, with the goal being more about filling it up than about selecting colors. Sometimes they try to choose specific colors, but get frustrated digging through all the tiles trying to find just the blue or just the white ones.


Usually I set up the boards on a table with individual containers of tiles, so each child has their own materials. But one of the problems is setting up this activity so each child has enough tiles to fill their board. The boards take up a lot of space, and so do the containers. Now that we’ve reached the point in the year where they children are more comfortable sharing materials, I thought I’d try putting the tiles in a container in the middle of the table.

At first I was going to put them in a shallow basket, but then I noticed a divided container that I usually use for playdough toys or art materials. Seeing the five sections, I wondered what would happen if I sorted the tiles by color.


Of course, their play was immediately more intentional. Some of the children always showed preference for certain colors, but the tasks of simultaneously sorting and arranging were too much. Now that the tiles were neatly arranged into color groups, most of the children could concentrate on choosing the colors they wanted.


At first they each chose a single color and created relatively monochromatic designs.

But as they worked longer, they began to combine different colors. No one made patterns or representational designs, but there was a clear intention in the children’s work, as they chose materials, instead of simply picking up whatever was in reach and randomly putting it down. The arrangement and presentation of the materials matter. One small decision by a teacher to set up the materials in a slightly different way changed how the children were able to use the materials.

Just like many of us would rather choose which pen to write with than randomly reach into a drawer and take the first one we find, children also want – and need – the opportunity to choose, plan, and make decisions about their own work.