Sunday, January 24, 2016

A Table in the Sand Table - Part 2

A few weeks ago, I wrote about putting "a table in the sand table" – creating a work surface that children could use to pile sand, arrange loose parts, and manipulate objects closer to their eye level. The pegboard had many interesting properties, but one problem. In some ways, it was too big for the table. It was difficult for children to reach under and around, and there wasn’t much space for children who wanted to dig and pour the sand without the table being in their way.

I decided to try a different type of surface – a long flat piece that would go across the middle of the table. Ideally I would have like to use wood, but with my limitations on time and material, I chose cardboard. I cut a long strip out of a cardboard box, and cut three large rectangles across the surface. Part of the children’s explorations with the pegboard “table” involved pouring sand through and pushing objects underneath. I wondered what they would do with larger holes that hands and objects could fit through.

I secured the cardboard strip to the sensory table with duct tape at the ends, and used masking tape to tape together two stacks of unit blocks to serve as supports in the middle. I taped down the cardboard to these supports to hold it in place.


Initially, the children’s main interest was the holes. Pouring sand through, dropping objects through, and sticking their hands through


One child said he didn’t want any holes, and asked me to cover them up. I gave him some pieces of cardboard, and he covered each hole, to create a solid surface. This added a new dimension to the play, which quickly shifted to piling sand on top of the cardboard slats, then pulling them away to watch the sand fall through the holes.


The cardboard strip and slats became not only a work surface, but a place for physics exploration, covering up holes, creating ramps, and balancing objects.


Sunday, January 17, 2016

"I'm Doing Mixed Up Colors"

My class has been exploring the different textures of painting tools: brushes of different thickness and shapes, sponges, balls, and most recently, small round sponges on the ends of sticks. The actual name of these is "sponge stippler" (as I discovered after a long internet search), and they provided a novel textural experience than the other tools, The small size was easy for the children to control, and the sponge held just enough paint to glide across the paper, but not so much that it dripped.

One of the physical properties of sponge painting is the way that colors mix together, which became the main focus of the children's attention.


"I'm doing mixed up colors."
"Look I'm putting red to yellow."
"And blue to red."
"What's that kind of color?"
"It changes yellow to red."


I've written before about teachers watching and not talking as children work. The discovery process in this painting project wasn't about discovering what would happen when the colors mixed together. It was about the experience in the moment of combining colors, of swirling one over the other and letting the children create and observe change as it happened. "I'm putting red to yellow" isn't about making orange: it is, as another child said, "I'm doing mixed up colors."

As a teacher it's sometimes hard to just sit and watch the "doing". One of the children began her painting by using the sponges as stamps, making large dots all over her paper, and then carefully tracing them with more paint. But then, she moved her sponge in broad strokes, obliterating the circles, layer after layer. To make more circles, and sponge over them again. It's sometimes hard to watch the process of creation upon creation, of mixing upon mixing, and just let it happen without questions or comments, or interruptions to the flow. But I'm not the one in charge of the "doing". The "doing mixed up colors" belongs to the child.


Tuesday, January 12, 2016

A Table in the Sand Table

One of the things I’ve always wondered about sensory table design is why there isn’t usually a convenient work area for children to place and arrange materials. Sensory tables are designed as deep receptacles where sand, water, and similar substances can be moved about without spilling over, but there isn’t any easy place to put a filled container on a solid surface to fill it, or to assemble a group of objects that you’re working on.

To solve this problem, I sometimes put a wire closet storage shelf inside the table, providing a convenient surface for children to set their cups and scoops on. And sometimes, the holes in the mesh provide another medium to experiment with, as children pour sand or drop objects through the holes.


After watching the children pour sand over and through the large square holes, I decided to attach a pegboard to the wire shelf, to see if they would be interested in experimenting with how sand pours through those smaller holes. I used a clear sheet of plastic drilled with rows of pencil size holes.


Some of the children noticed the movement of the sand through the holes, but for most of them, the pegboard was just another table. Some were interested in the texture of the surface, and the sound made by pushing the sand across the plastic. The next day I added paintbrushes to the sand, and the children swept and brushed the sand in swirls across the pegboard. But what interested them most was laying objects on the pegboard, and using it as a table, or as a palette or staging ground for their ideas.


Maybe it was the solid surface that held objects up so much better than loose sand does. Or maybe it was the visual perspective of being able to arrange and manipulate objects so much closer to their eyes and line of sight than deep in the bin of the sensory table. Whatever the reason, the table-in-a-table gave some extra scaffolding and support, both literally and psychologically.


Tuesday, December 8, 2015

"Teacher, You Talk Way Too Much"


An anecdote I frequently go back to happened many years ago, in a school where teachers had been trained to “actively reflect” what the children were doing, based on the idea that verbal narration would help scaffold and extend their learning. One morning I watched a teacher sitting with a four-year-old girl who was very intently building a wall across the block area. As she slowly turned each block on its end, the teacher watched and commented. “Oh, I see you’re balancing the square on top of the block.” The child made a second row on top of the first. “I see you’re making another layer”, the teacher said.  Then, several blocks fell over, and the teacher observed, “Some of the blocks are falling. What do you think made that happen?”

The child turned to the teacher and said, “Teacher, you talk way too much.”**

This situation, and many others like this, started me thinking about how teachers speak to children while they play. Teaching in a play based program changes the traditional role of the teacher. She isn’t there to provide instruction or to directly present information. Her job is to structure the environment, choose materials, observe, and to facilitate play. But I’ve always struggled with exactly what “facilitate” means. On the one hand, in a play based program, children are given the time and space for independent discovery. On the other hand, teachers can provide information, suggestions, and observations that might challenge the children, extend their thinking, or lead them to reframe their explorations.


But there’s a third possibility. Sometimes we’re just talking because we don't know how to not talk while teaching. The quiet, concentrated focus of child-directed play can leave a vacuum of silence. And, even for teachers trained to be facilitators rather than instructors, it’s hard to step away from the baggage of the teacher role. Sitting and watching a child draw, or build with blocks, or dig in the sand leaves us feeling like we should be “doing” something. Especially when there’s a traditional academic objective to reinforce. It’s hard for us to restrain ourselves from counting the blocks that a child lined up, or commenting that their playdough looks like a letter “O”, or repeating “yellow and blue make green” each time a child combines those two colors of paint. But does the child really need to hear us say those words for the learning to happen? Sometimes even open ended questions are more for our benefit than for the child. “Tell me about what you’re making.” “What happened when you mixed the colors together?” Our verbal narration and questioning of their activities shifts the value from their doing to their describing. If we truly believe that children learn through play, through self-directed activity, and through the process of discovery, then we need to respect that process, and allow children to be engaged in the flow of meaningful activity without being interrupted by us. 


That’s not to say that teachers shouldn’t speak, but our words should be meaningful, our questions genuine, and our comments presented with the intent of furthering the child’s activity, not simply narrating it. And sometimes, the best support we can give to a child is to simply be present. Today I sat next to a two-year-old who was drawing with markers. I held back the comments like “That’s a long red line around your whole paper” “I see you’re making lots of purple dots” or the vague “You’re working so hard on that picture.” I didn’t say anything, and just watched her work.

I’m pretty sure she already knew all about her red lines and purple dots.


**from Michelle B, Patt & Artin Göncü, "Talking the Talk: Constructivist Teachers Guiding Children's Problem Solving", in Children in Play, Story, and School, Artin Göncü & Elisa L. Klein, Eds., 2001.

Wednesday, December 2, 2015

Please Don't Eat The Playdough


Playdough is a regular feature in my classroom. Playdough or a similar material is available every day. It’s one of the best manipulatives out there. It’s easy to manipulate, and is completely open ended. A few squishes, presses, and pulls, and it can be anything you want it to be.
I’ve use several different recipes, but my favorite is a cooked playdough (the recipe is at the bottom of the page) that is soft, and stays good for weeks. The problem is, some kids like the taste of it. I haven’t tasted it myself, but from the ingredients, I imagine that it tastes like a salty bread dough. This isn’t a problem with older children, but toddlers, twos, and even young three-year-olds sometimes put it in their mouths. And occasionally, there are children who repeatedly put it in their mouth through the morning as they’re playing.


So, what should I do if I don’t want the children to eat the playdough?

As I discussed ideas on education blogs and with some teachers I know, several interesting themes came up about young children eating/tasting/mouthing materials, that I wanted to reflect on in terms of how those ideas fit with my teaching philosophy:

If they’re eating the playdough, maybe they’re too young for you to give it to them.

Why not just let them eat the playdough, and look at it as another way of exploring materials?

Find ways to teach them not to eat the playdough, and don’t let them use it if they keep eating it.

I understand all three of these perspectives, but none of them fits with my goals for using playdough in my classroom, and my philosophy of how children learn how to interact with materials at school. Young children often use materials in a ways that need to be redirected by a teacher. Sometimes it’s for health or safety reasons – in this case, fingers and playdough in and out of mouths as the children play presents health concerns. Sometimes it’s about taking care of the materials – in this case, if the children mouth or eat the playdough, we don’t have it to use anymore. And there’s also the central goal of being at preschool – learning how to interact with the materials and environment in a way that is respectful to the other children in the group, and that facilitates learning. I want the children to be able to explore materials freely, but also to explore in ways that allow them to have the experiences that I’ve planned for them, and to reach the learning goals that I’ve set for them. Not giving playdough means they won’t have those experiences. Letting them eat the playdough changes the focus from the original activity to an eating activity. And “teaching” them not to eat the playdough, with negative consequences if they fail to follow my instructions, puts me in the position of policing their play, and takes away some of their ability to play independently.

A better choice is to choose materials that will scaffold the activity without needing my direct intervention. We know young children might rip book pages so we give them sturdy board books that can’t be ripped. We know they might pour out large containers of paint, so we give them small ones that aren’t filled to the top. So, I decided to create a playdough recipe that would send a sensory cue that “this isn’t for eating.” The materials teachers choose, and how they're presented can "tell" children how they can be used (read more here).

So instead of creating my usual playdough that looks and smells like cookie dough, I altered the recipe to make it look less like food, and so it wouldn’t taste good if anyone decided to put it in their mouth. I used green, red, and a little blue food coloring to give it a grayish-greenish color (almost the color of clay). And I added vinegar and lemon juice as I cooked it to give a faint (not overpowering) sour aroma and a strong sour taste if a child decided to eat it. I also put it out with loose parts the children hadn’t used before, instead of the rolling pins, cookie cutters, and plates that suggest food themed play.


There was lots of rich and varied play, but no eating.


 And here are the recipes…. The cream of tartar in cooked playdough acts as a preservative, so the playdough stays fresh for weeks. Vinegar does the same thing, so if you make the “not food” recipe, you don’t need the cream of tartar. Store either dough in a sealed container.
Cooked Playdough Recipe


2 cups flour
½ cup salt
2 cups water
2 tbsp. oil
2 tbsp. cream of tartar
Food coloring (optional)

Mix together in a pot, then cook while stirring until mixture becomes solid.

“Not Food” Cooked Playdough Recipe

2 cups flour
½ cup salt
2 cups water
2 tbsp. oil
2 tbsp. vinegar
2 tbsp. lemon juice
A few drops each green, blue, and red food coloring (to look gray)


Mix together in a pot, then cook while stirring until mixture becomes solid.

Sunday, November 22, 2015

Rules and Reasons


Last week, Teacher Tom 
wrote a blog post titled “Eleven Things to Say Instead of Be Careful.” The blog was focused on the issue of “risky play”, better described by Teacher Tom as “challenging play” or “safety play”, and he suggested some more descriptive ways of explaining what we mean to children when teachers say, “Be careful.” His first example was “"That's a skinny branch. If it breaks you'll fall on the concrete."

What struck me about this statement isn’t just the clarity and honesty of it, but that a teacher was giving a child an explanation for why they should or shouldn’t do something. So often teachers tell children to do something or not do something, without giving any reason. “Be careful” falls in that category. So do so many other statements, sometimes given as a direction, sometimes worded in a way that relieves the teacher of direct responsibility, without actually giving the child the reason. “Chairs aren't for standing on.” “We wear hats when we go outside.”  “The blocks can’t be higher than your head.” All might be reasonable expectations for children, but wouldn’t they sound even more reasonable if we explained to the children why we’re saying them?

“That chair isn't sturdy enough for you to stand on.”

“I’d like you to wear your hat to keep your head warm.”

“I’m worried that if the blocks are that high, they might fall on your head and hurt you.”


Of course, when we give the children a reason for what we’re saying, we’re opening the door for them to present a counterargument, but isn’t that part of learning how to interact with others in a democratic society? Children need to understand that there are rules, but not that rules are unilaterally imposed on other people without reason. When teachers revert to “it’s the rule” or some version of “because I say so”, children might follow it, but only because of the teacher’s authority, not because of an inherent sense that it’s the right thing to do. If we want to teach children about morality, decision making, and perspective taking, we need to model democracy in our own speech. Rules don’t spontaneously exist, they’re created by people, and they can be changed by people. Perhaps that’s why teachers are so hesitant to let children into the process, because of a fear that even these very young people will try to change the rules and take some authority away from the teacher. I would argue that if the only way you can maintain authority is to remove dissent, that authority isn’t valid, even over children. If we want our children to grow up to understand fairness and reason, we need to include them in the decision making process, even if it’s only by explaining our reasoning to them.


And maybe some of our rules will need to be changed after all.


Wednesday, November 11, 2015

In Praise of Big Blocks


When my son was four, he loved preschool. One of his only complaints was that he hardly ever got to play with the big blocks. His classroom had a long wall lined with hollow blocks (aka “big blocks”) but that area was only occasionally open for play. “What did you do at school today?” I would ask. Sometimes he would say, “The big blocks were open today!” followed by an excited description of what he had built. But much more often, his first words about his day would be, “The big blocks were closed.”

Hollow blocks are a preschool classroom staple, either in their own area, or combined with unit blocks. But often, teachers discourage or ban their use. Teachers sometimes say that the play gets too out of control. Or that the kids argue too much while building. Or that the themes that children use are too violent, scary, or wild. Or that blocks aren’t safe, because they might fall on someone. When children are allowed to play with big blocks, it’s often with a lengthy set of limits and rules: how many children can play at a time, restrictions on what can be built, and limits on the height or size of a structure.


Why are teachers so scared of big blocks?

Yes, the play can get active. But, just like any other activity, whether it gets “out of control” depends on teacher guidance, interaction, and support. Yes, children will argue about what to build and how to build it, but that social interaction should be a goal, not something to avoid. Negotiation about planning, ideas, themes, and roles are crucial social skills that children learn by doing. Eliminating settings for this negotiation might prevent social conflict, but it also eliminates opportunities for children to practice and improve these skills.


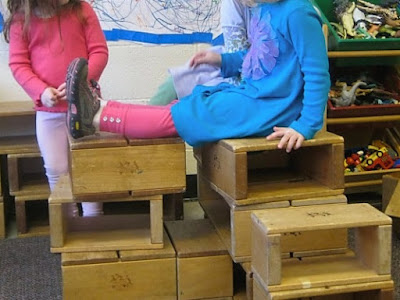
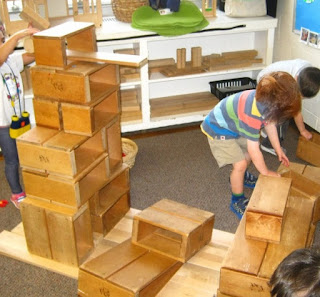
Children are drawn to the big blocks simply because they are big blocks. It takes work to move them – challenging, physical work. Children are drawn to the scale of the big blocks because they can make structures that are their own size and that they can fit on, in, and under. They are captivated by concepts of height and risk. The concern that a block could fall on someone’s head might be expressed as fear by the teacher, but for the child, that concern is turned into a challenge of how to prevent it from happening. Figuring out how to build a strong, stable structure, nearly as big as or even bigger than their own bodies, gives children a chance to express competency, confidence, and skill. It involves imagination, creativity, engineering, and design, all in the context of social interaction, as a group – sometimes a large group – of children discuss, debate, argue, and negotiate about their ideas. 


Yes, the big blocks can be risky. And loud. And wild. But they can also be imaginative, inspiring, thought-provoking, and cooperative. They can be the place in the classroom where rich, collaborative, social play happens. They can be the place where children propose and test ideas and evaluate their results.  They can be the place where children learn how to disagree and discuss differences of opinion. They can be the place where children test their limits and abilities, and push themselves to see what they can accomplish. And we, the teachers, can stand beside them and support them each step of the way.