Friday, March 25, 2016

Transporting and Transforming Loose Parts

One of my favorite materials to use with older preschoolers are large glass beads (aka glass beads or sea glass). You can buy them in bulk at dollar stores or craft stores, and the children use them in limitless ways – as pretend food, for sorting, or for arranging into patterns and designs.


Unfortunately they’re too small for toddlers and twos, or for any child who puts objects in their mouths. So I was thrilled to finally find glass beads and shapes that were bigger. Just to be sure, I checked them with a choke tube to make sure they were too wide to be choking hazards.
I put the beads out on a brightly colored metal tray, and some more in a bowl next to it, surrounded by a few different types of containers.


As the two-year-olds began to explore these new materials, their focus was mainly on transporting the beads from one container to another. A few of the children gave the containers a careful shake, and then a more energetic shake, noticing the difference in sound as the beads rattled against wood or against metal.


Soon other children came over to see what was going on, and wanted beads of their own. One of the beauties of loose parts play is that there’s usually a lot of the loose parts materials, which makes it easier to share, even if you’re two-years-old. The child carrying the bulk of the beads in a wooden box carefully reached inside and pulled out two beads to hand to each child. Two beads – one for each hand – seemed to be a satisfying solution for everyone, and they sat, examining their beads.


As the morning went on, more beads were passed from child to child, and more containers were filled. Soon, some of the beads were transformed into “gold doubloons” that were hidden in “treasure boxes.” Some were carried to the kitchen and transformed into food to put into the oven, and water to pour into the sink.


And some beads stayed on the shelf, as children transported them from one container to another, sometimes with their fingers, sometimes by pouring from one container to another, watching as the physical arrangement changed as the beads were lined up, stacked up, or simply put into a pile in a bowl.


Tuesday, March 8, 2016

Thinking Small

I’ve written before about how the scale of art materials affects how children use them. Large paintbrushes and large paper elicit broad, wide brushstrokes, while smaller brushes encourage smaller and more precise movements across the paper. The same situation happens with sensory materials. Large scoops and shovels encourage large movements – which isn’t a problem unless the teacher doesn’t want vibrant, active movement at the sensory table. So often, teachers repeat the refrain, “keep the sand in the table” or “it’s not okay to throw sand”, after giving children huge shovels that naturally call for swinging sand over shoulders and across the table. And there are the natural spills that happen when a large bucket is filled and turned over. If the teacher wants the sand to stay in the table, then the first step is to plan the environment and choose materials that will make it easier for the sand to stay in the table.


In addition to helping classroom management, for younger children, smaller scale scoops and containers can be easier to hold and manipulate. It’s easier to fill a small container than a large one, and easier to provide enough material in the table for all the children to be able to fill their containers.

I set up a sensory table filled with moon sand, small plastic bowls, and measuring spoons. The measuring spoons have the added characteristic of being able to mold the sand into domes or balls. I added large plastic shapes that the children could bury in the sand, or use to fill their bowls.


Over several weeks, I changed the containers, and the objects that were hidden (or could be hidden) in the sand. The most appealing were small plastic animals, which they children covered, uncovered, and placed on top of the cakes that they molded in their containers. 


The one constant as the objects changed was that they were all small. Small enough to fit in their hands, small enough to hold a cup in one hand while holding a spoon in another, small enough to fill up and proudly feel a sense of accomplishment. And small enough for the children to clean their spills independently, allowing them to take ownership over their activity, instead of needing a teacher to manage it.


Sunday, February 21, 2016

Discoveries in Dark Water

I’ve always felt that sensory table play should have materials that suggest different purposeful things that children can do with them. Scooping, filling, and dumping is interesting at first, but once children master these skills and simple materials, they tend to get bored with water or sand play. Or, if they can’t easily find a goal oriented task with these materials, they sometimes create their own goals – which might not always be ones that the teacher is comfortable with.

 One material I like to add to water are objects that children can look for, sort, and gather. Any waterproof manipulatives that could be used on a table or other surface can be used in water. Coloring the water by adding watercolor paint provides a visual contrast, and if it’s dark enough, can provide the suggestion of hiding and finding objects in the water.


I colored the water a deep blue, and added large plastic buttons and counting bears. The colors provided a vivid contrast, and as an added bonus, the plastic buttons floated on the water.
The children gathered objects, sometimes naming the colors, or, in the case of the buttons, the shapes. Some tried to balance bears on floating buttons. One child noticed that blowing on the buttons pushed them across the water.


The next day I tried this with black water and different objects – thick poker chips and rocks. The children showed almost no interest in the rocks. The poker chips, like the large buttons, became objects to hide under the water, scoop out, and stack.


The conversation turned to how the different objects looked under the water, and what else we could hide in the water next time.

Thursday, February 11, 2016

Shaving Cream

For many teachers. shaving cream is one of those “go to” sensory activities. But I have mixed feelings about it, because it’s one of those materials that asks the question, “What am I supposed to do with this?” Not “What can I do with this” or “How do I make this work?” but “What do you expect me to do with this blob of stuff?

You can squish it. You can spread it. Usually children are captivated by the initial sensation of the texture, but after that, there’s not much more to do. A few gross motor waves of their hands on a tray or a tabletop, and they’re done.

So, what can we do to make shaving cream play more engaging?

Two of the strategies I like to use with sensory materials in general is defined space, and planning specific tools to use with the material. Particularly tools that require some thinking about how to use them. A big tray or deep table of shaving cream suggests sticking your hands into it, but now what? Or, if you’re not someone who wants to stick your hands into goop, is there even any way you can participate?


I set up the shaving cream in individual bowls, so each child could start with a small amount. Enough to squish and handle, but not so much as to be overwhelming. I colored the shaving cream with liquid watercolor to add the visual dimension of mixing, combining, and matching colors. And I put the shaving cream out with tools that suggest a purposeful task: paintbrushes and foam blocks.

Most of the children went straight to painting the blocks. Painting a three dimensional shape is a novel sensory challenge.


 Shaving cream was a perfect substance for holding stacks of blocks together.


Observing the swirls of color as the contents of the different bowls was interesting too.


Of course, sometimes squishing and squeezing is all you need.


Note: I’m aware that there is some disagreement about whether shaving cream is safe for children to use. The label says “Keep Out of the Reach of Children”, but it’s unclear whether that warning applies to the can (and the propellant inside), or the shaving cream itself once it’s not in the can. I’m not a chemist, but the ingredients don’t appear to be any different than the ones in soap or even diaper wipes, and the same warning is on other aerosol cans, like whipped cream, which is obviously non-toxic. So I’ll leave the decision about the safety to individual teachers, but I couldn’t find any universal “rule” saying shaving cream shouldn’t be used in classrooms. As with any material, if your licensing or accrediting organization or your center policy doesn’t allow it, use something else instead. And, as with any material, always supervise children while they’re using it – even non-toxic materials require supervision, especially for children young enough to put things in their mouths.


Thursday, February 4, 2016

Wheat Free, Corn Free, Soy Free Playdough

After discovering that my gluten free playdough recipe worked, I excitedly shared it with several parents of children who have gluten sensitivity or wheat allergies. One of the parents mentioned that this recipe wouldn’t work for her child who, in addition to gluten sensitivity, also has corn sensitivity.
She suggested that maybe tapioca flour or potato starch would be a good substitute. So I altered the recipe to use potato starch instead of cornstarch. I also used grapeseed oil instead of soybean oil, to eliminate another potential allergen.

1 cup potato starch
2 cups baking soda
1-1/4 cups cold water
1 tablespoon grapeseed or canola oil
1 tablespoon food coloring

I mixed the ingredients together in a pot, but the first thing I noticed was that the starch didn’t dissolve. It started to form a thick paste instead. I turned the stove to low heat and waited to see what would happen.


As I stirred, the mixture started to look like pudding or hot cereal. I had originally used yellow food coloring, but decided to add some green so the dough would look less like food.


 The mixture never started to bubble, but started to firm up and become solid. It didn’t thicken much, so the recipe made half as much dough as I expected.


 I took it out of the pot and put it on a plate to cool. The texture was different from both the flour based playdough and the   cornstarch based playdough  that I had made before. It felt lighter and a little more oily (I don’t know whether this was because I used grapeseed oil or it was just how this recipe is) than I expected. It also crumbled slightly – it resembled “Cloud Dough”, a flour and oil mixture that's another interesting tactile sensory experience.


Even if it isn’t exactly like traditional playdough, it’s a good alternative for children who can’t play with wheat (or corn or soy) based products. And it’s another type of sensory and tactile material for children to experience.

Tuesday, February 2, 2016

Cornstarch Goop: Wet and Dry and Wet Again

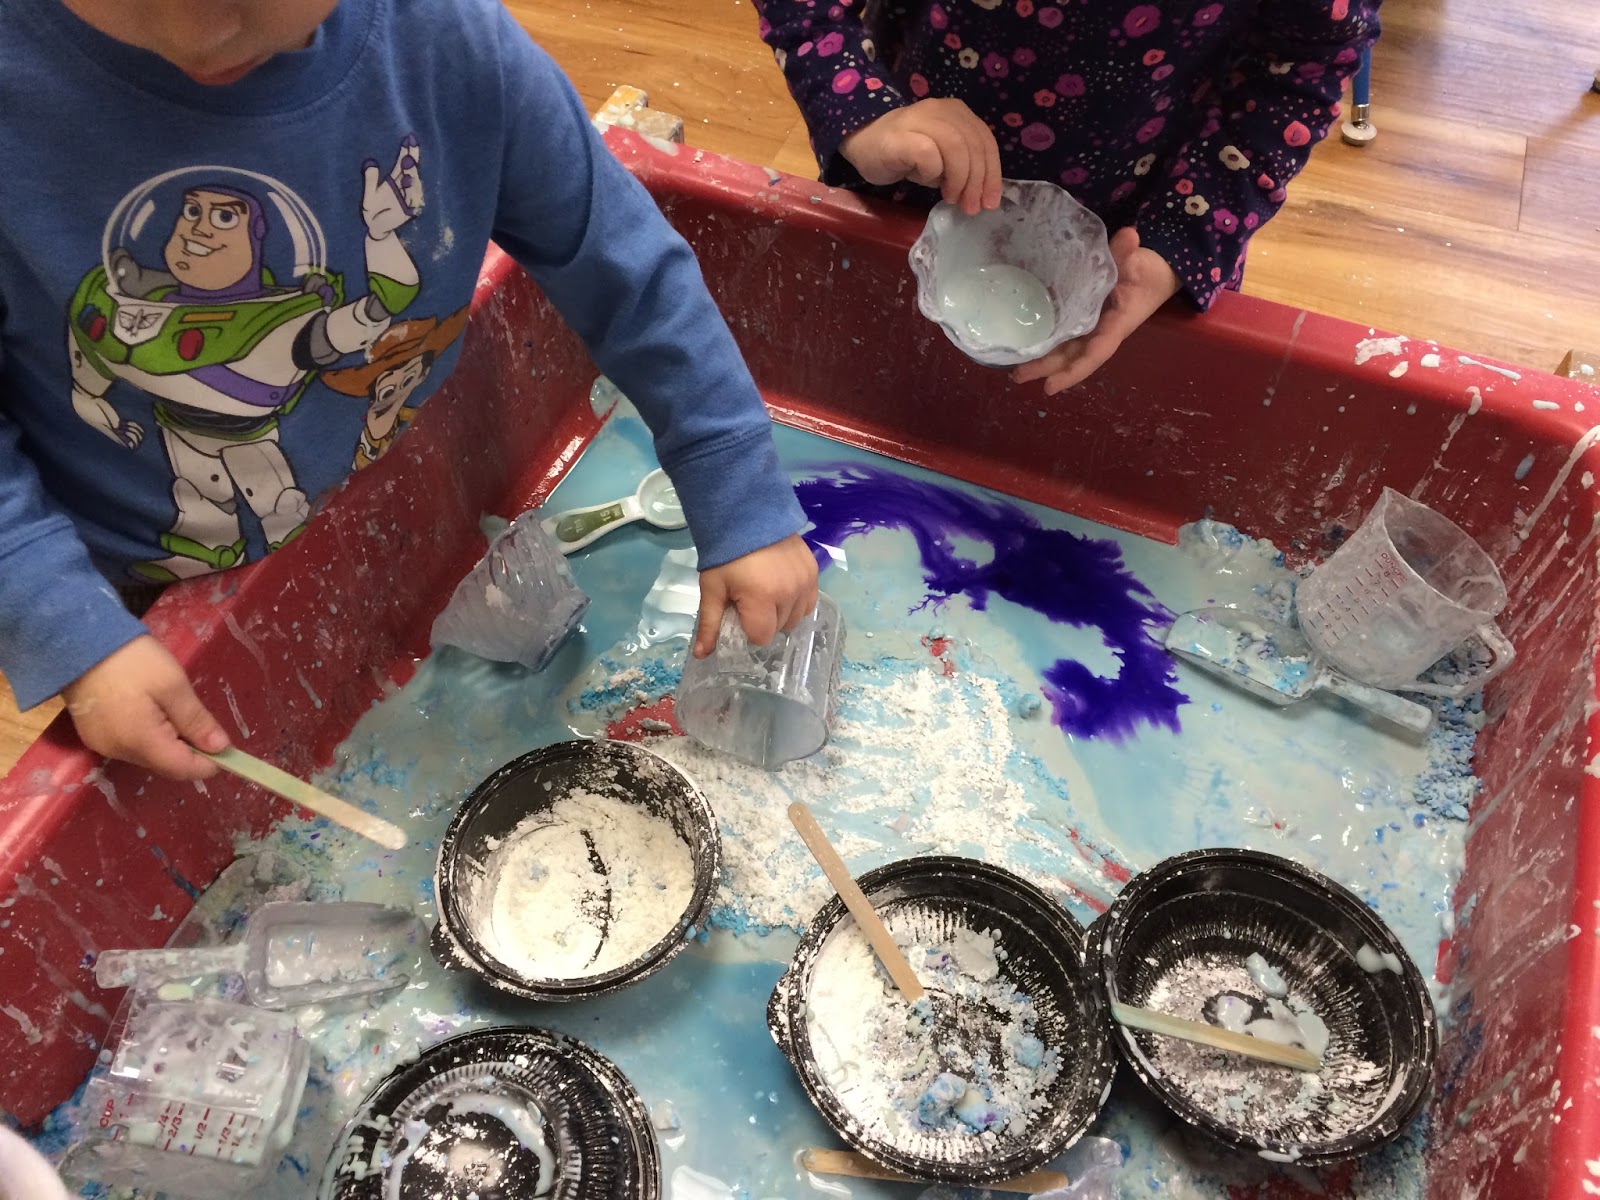
 After the explorations with frozen goop, I let the goop dry in the sensory table, and then gave the children the ingredients to mix a new batch of goop.


cornstarch

There’s no recipe, just cornstarch and water. I added liquid watercolor paint to the water, and placed the pitchers of water and bowls of cornstarch in the sensory table for the children to discover.


At the end of the day, it was time to leave the goop to dry out again. By the next day, it had dried into a thick, chalklike sheet, which crumbled easily into large and small pieces that could be scooped and spooned.


But, what is dry can be made wet again, so it was time for more pitchers of colored water.

Mixing cornstarch and water to make goop

Once everything was mixed together, it was too watery, so it I refilled the bowls of cornstarch.


And, once more, the mixture dried out again. All ready to be made wet again the next day.


Note: If you want to try this yourself, here are some tips. 1) If the goop is very wet at the end of the day, drain off excess water before leaving it to dry. 2) Be sure to leave the sensory table uncovered. If you have to cover it, use a light sheet and leave it vented on the sides so air can get through. 3) The drying process doesn’t work as well in humid weather. 4) If your goop starts to smell bad, or has black specks in it, it’s time to throw it out, sanitize the sensory table, and start again with a new batch.


Monday, February 1, 2016

Frozen Goop

I’ve written before about cornstarch goop (aka “oobleck”). It’s a mixture of cornstarch and water that changes state from solid to liquid as you stir it, pick it up, or press it in your hands.

Another way to use this material is to freeze it. Frozen goop is truly a mystery material. Children don’t have any prior knowledge or experience to base their actions on, so they approach this material with curiosity and scientific exploration.


I prepared the goop by mixing cornstarch and water, then pouring it into small plastic cups with some liquid water color paint. I put the cups in the freezer overnight. Getting the frozen goop out of the cups is tricky – you have to let them defrost a little bit first. I put the cups on the heater vents, but you could also dip them in warm water to loosen the goop from the cup.

Once I got the goop out of the cups, I put it into the sensory table with some various small cups and scoops.


It looked a little like ice cream, even though after touching it, no one seemed interested in putting it in their mouths.


The texture was something like very cold, icy snow. As it warmed, it melted into a thick, syrupy goop that slid on hands and across the table, and that could be spooned and scooped, and poured from cup to cup.